2. Prepare for Assembly
During this step you will be preparing your workspace for assembling the X-Carve Pro. Remember, the X-Carve Pro is packaged so components can be removed from the box as assembly is occurring.
There is no need to unpack everything prior to assembly.
| Machine Size | Recommended Table Size | Recommended Total Workspace |
| 4x2 (65.75” x 31.6”) | 6’ x 3’ (min 500lb weight limit) | 8’ x 14’ (to allow for tiling full 4’ x 8’ sheets) |
NOTE: Ensure your work surface has enough space to stand around the entire perimeter for assembly, is level, and is strong enough to support the weight of the machine and any materials.
Video
Steps
- Workspace Preparation
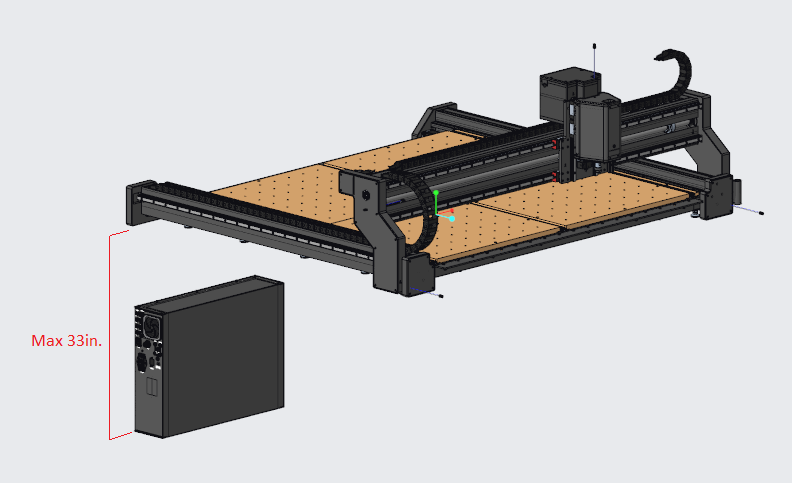
- Position the controller near the end of the Y-axes that have the motors in an area that is out of the way of normal traffic, such as under your table or workbench.
NOTE: The controller has to be positioned vertically (as shown) since this will allow for optimal thermal performance.
- Place the HMI, cable harness, toolkit, and hardware bag in an easily accessible location to where you will be assembling the X-Carve Pro.
- Position the controller near the end of the Y-axes that have the motors in an area that is out of the way of normal traffic, such as under your table or workbench.
- Lay Out Crossmembers
- Place the 3 crossmembers on your table, spaced roughly 12” from each other. Ensure that the outside crossmembers are the ones that have the leveling feet.
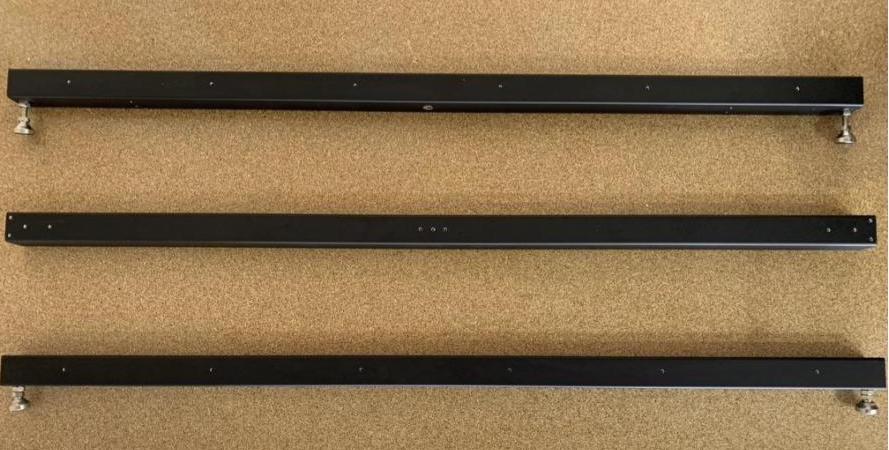
NOTE: Orient the front and rear crossmembers with tapped holes facing the front and rear of the machine.
- Place the 3 crossmembers on your table, spaced roughly 12” from each other. Ensure that the outside crossmembers are the ones that have the leveling feet.