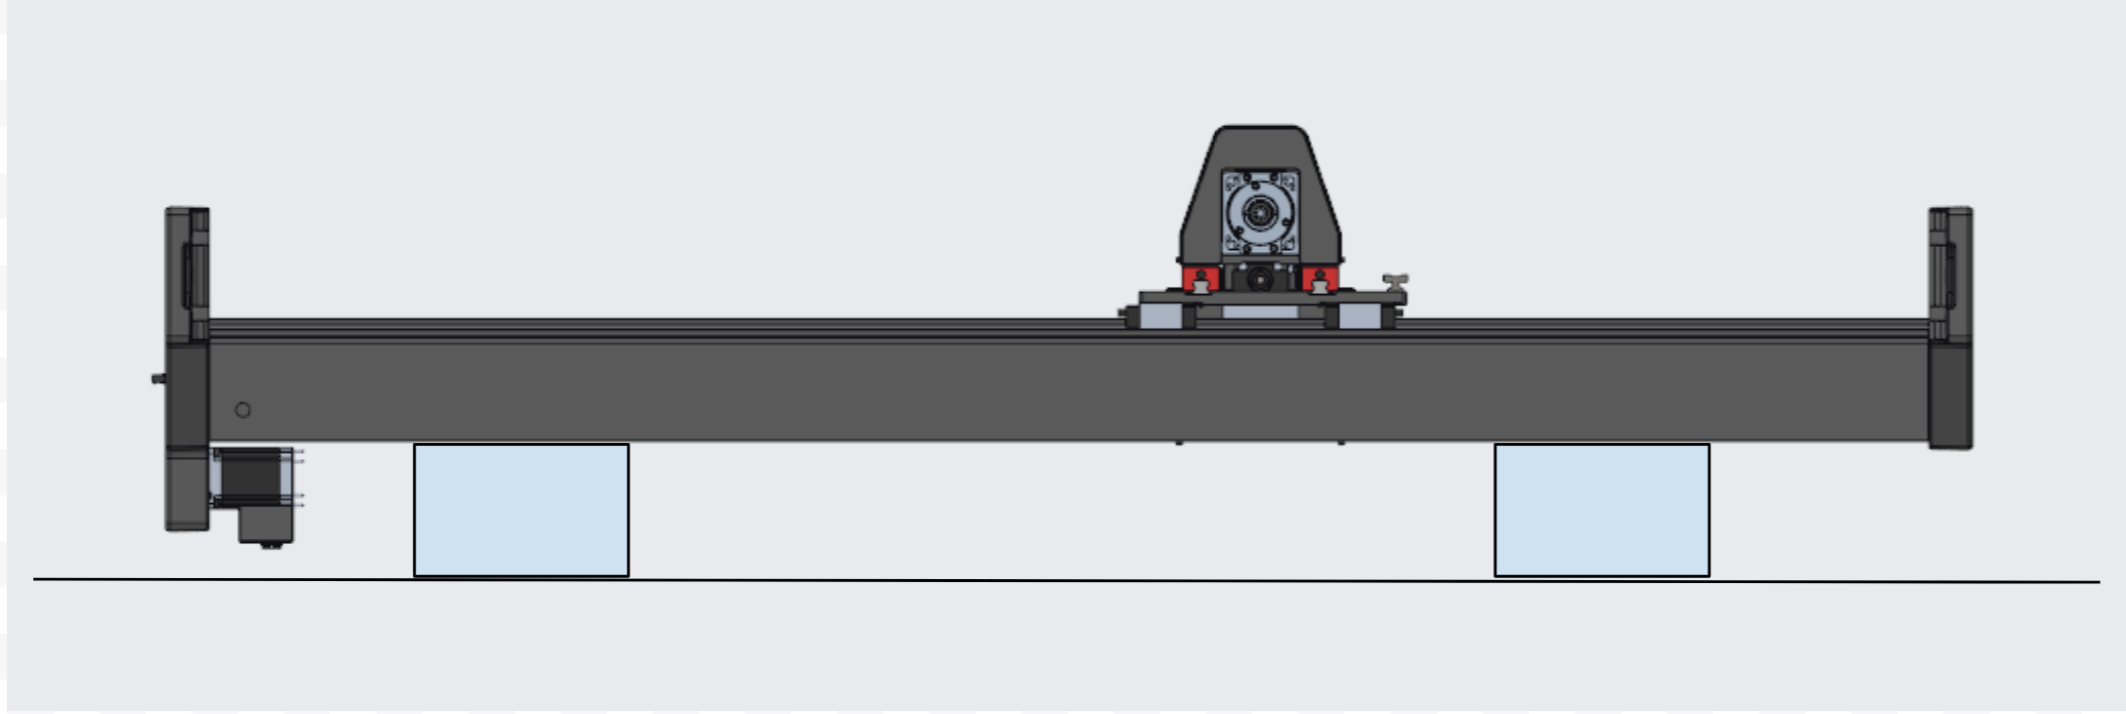
6. Install Gantry
During this step, you and another person will lift and install the gantry onto the X-Carve Pro frame.

WARNING: This step requires at least 2 individuals to complete. DO NOT attempt to lift and install the gantry by yourself as damage to the X-Carve Pro or personal injury could occur.

NOTE: Do not rest the gantry in any other orientation other than how it is packaged in the box with the spindle facing upwards. If you must place the gantry down for any reason, do so such that the weight of the gantry is resting on the back of the extrusion, opposite of the spindle (see below).
Video
Tools
- 4mm allen key
- Torque wrench w/ 4mm hex bit
Hardware
- M5x22 SHCS x 4 (with red mark)
- M5x25 SHCS x 6
- Flat washer x 10
- Spring washer x 10
Steps
- Slide Y-Axis Adapter Plates
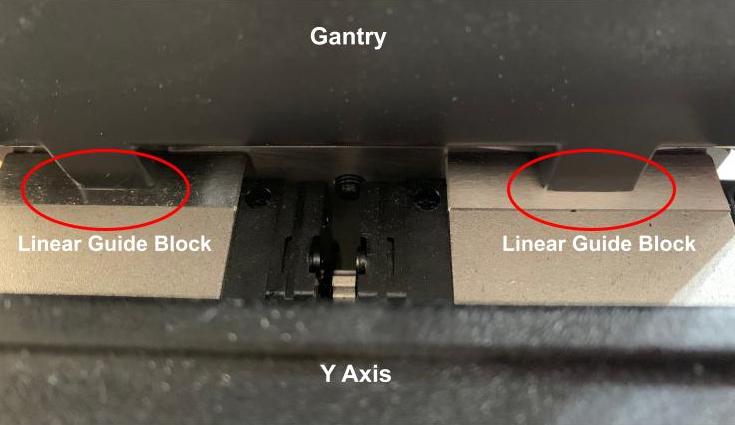
- Using your hands, gently pull the silver plates that are attached to the linear guide blocks on the Y1 and Y2 axes toward the front of the machine until they are within 1/2” from the end cap.
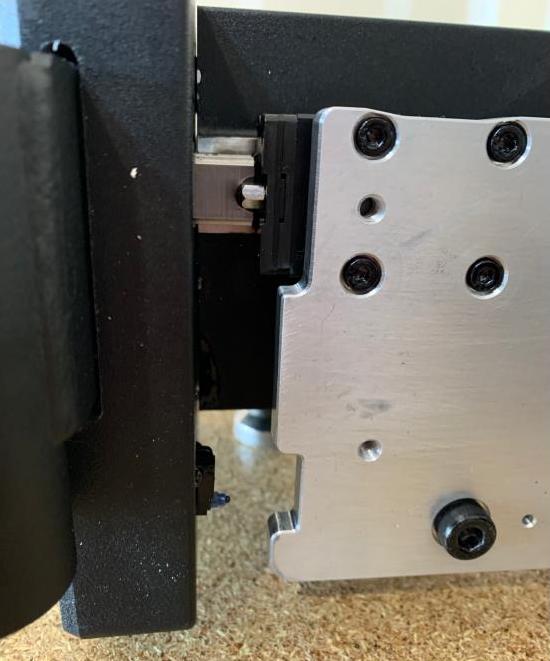
- Using your hands, gently pull the silver plates that are attached to the linear guide blocks on the Y1 and Y2 axes toward the front of the machine until they are within 1/2” from the end cap.
- Tighten the Y2 Axis
- Slide the Y2 axis toward the center of the machine, the holes in the Y2 axis are slotted to allow the axis to move from left to right.
- Tighten the first crossmember on the Y2 axis to hand-tight using a 4mm allen key. This will help to make the adapter plate on the Y2 axis perpendicular to the crossmembers and will allow for the gantry to easily be placed.
- Do not tighten the remaining Y2 axis crossmembers with the torque wrench at this time. Torquing the screws on the Y2 axis will be completed during the machine squaring procedure in step 13.
- Prepare Tools and Hardware for Gantry Installation
- Place the below hardware and tools at the front of each Y-axis near the adapter plates. Having the hardware and tools within reach will make the installation process easier and limit the amount of time holding the gantry.
- Hardware at the front of each Y-axis:
- Place flat washer on M5x22 w/ spring washer x 2
- Place flat washer on M5x25 w/ spring washer x 3
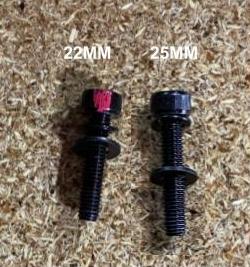
NOTE: The gantry has TWO different types of screws for each side that will be used to attach the gantry to the Y-axes. Pay close attention to the image below to ensure the screws are inserted into the correct holes when the gantry is ready to be attached to the Y-axes. The M5x22 screws have a red mark on the screw head to assist with identifying the correct screw during assembly.
- Tools near the front of the machine within reach:
- 4mm allen key
- Torque wrench with 4mm hex bit
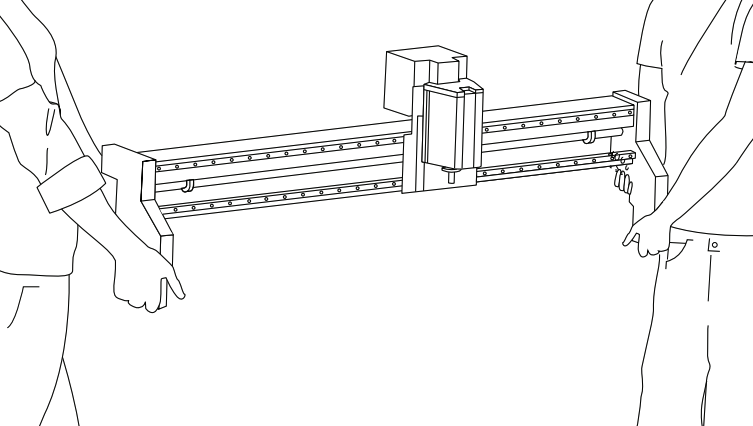
- Lift and Place Gantry
- READ THE NEXT SECTION PRIOR TO LIFTING THE GANTRY
WARNING: This step requires at least 2 individuals to complete. DO NOT attempt to lift and install the gantry by yourself as damage to the X-Carve Pro or personal injury could occur.
- With one person at each end of the gantry, lift the gantry by the riser over the Y-axis adapter plates and slowly slide it down until the gantry rests on the Y-axis adapter plates. Once the gantry is on the adapter plates be sure to keep at least 1 hand on the gantry to keep it from tilting backwards until screws are inserted.
- When the gantry is properly seated, the machined faces of the gantry plate will make contact with the linear guide blocks. If the gantry doesn’t seem to fit properly, ensure that the Y2 axis is moved toward the center of the machine, the front screws are tightened, and the adapter plates are both the same distance from the front end caps.
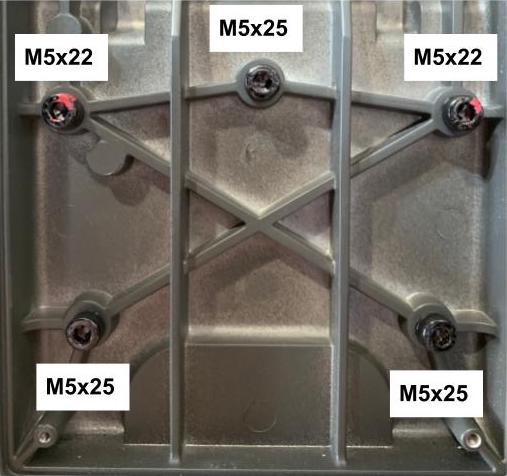
- While holding the back of the gantry, install the M5x22 and M5x25 screws per the diagram below using your hand or a 4mm allen key. The screws must be threaded onto the Y-axis but do not need to be tightened yet.
- Ensure both machined pads are contacting the block before fully tightening the screws. Loosen the 2 screws on the first cross member on Y2 side. This will allow the Y2 axis to slide more easily and allow proper alignment to the gantry in next step.
- Tighten the Gantry Screws Using the Torque Wrench
- Use the torque wrench equipped with a 4mm hex bit to tighten the gantry screws on the Y1 axis to 4.5 N*M, following the pattern below:
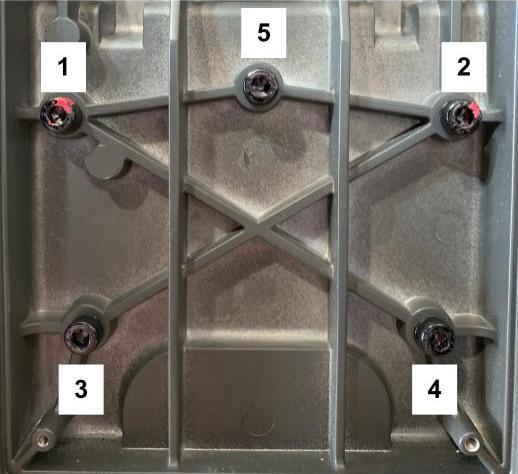
- Repeat the process for the Y2 axis.
- Use the torque wrench equipped with a 4mm hex bit to tighten the gantry screws on the Y1 axis to 4.5 N*M, following the pattern below: